


Front Loader in Kit Form for a Mini Tractor: Costs and Manual for Mounting on Iseki
Installing a front loader in kit form on a mini tractor is a valuable improvement that greatly increases the machine’s versatility. With a front loader, moving hay bales, scooping compost, or loading pallets becomes much easier and more efficient. In this article, you can read what costs to expect and how to connect a front loader to an Iseki mini tractor step by step.
Costs of a Front Loader Kit for a Mini Tractor
The price of a front loader kit varies depending on quality and application. Roughly, there are two categories.
Premium front loaders
These front loaders cost between €2,500 and €3,500 excluding VAT. They are characterized by a sturdy construction, often including joystick control, wider buckets, reliable hydraulic cylinders, and a neat finish. They are suitable for daily and professional use.
Budget front loaders
Entry-level models cost between €1,600 and €2,200 excluding VAT. These are built lighter and are often supplied with a simple joystick. They are especially suitable for occasional use, such as moving a few hay bales or light gardening work. In recent years, the quality of brands such as Katana and Sanko has improved, making them a good choice for hobby users.
Assembly costs
Those who have the assembly carried out by a mechanic pay an average of between €250 and €600 in labor costs. For a hobbyist, the assembly usually takes 5 to 6 hours, while an experienced mechanic often completes this within 2 to 4 hours. These amounts exclude parts and consumables.
Necessities for Assembly
In addition to the front loader itself, a number of parts are needed to carry out the assembly properly and safely:
-
Hydraulic valve with two sections: €120 – €250
-
Four hydraulic hoses: €80 – €150 (depending on length and couplings)
-
Connectors and T-pieces: €40 – €100
-
Oil and small materials: €30 – €60
In addition, basic tools, a jack, impact wrench and a lifting device are necessary.
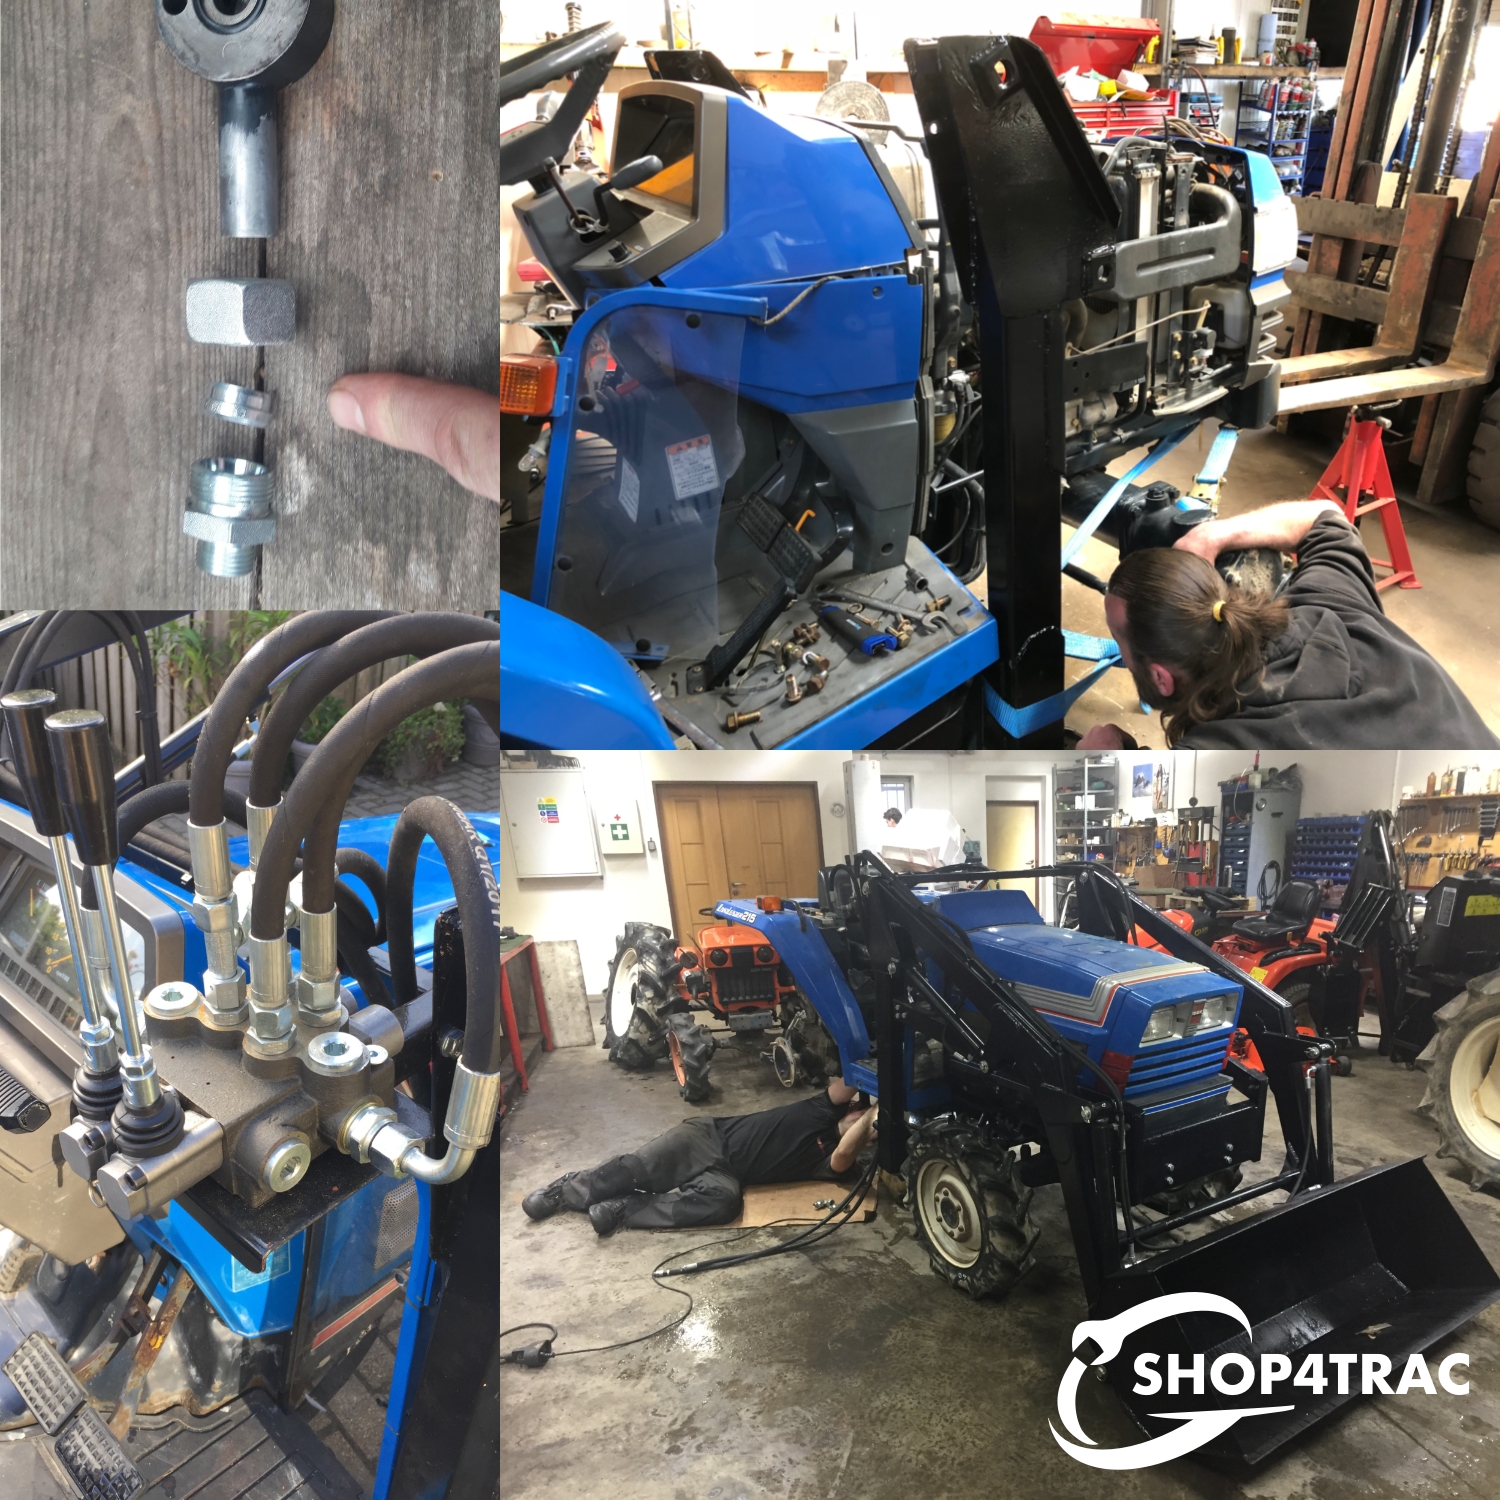
Manual: Connecting the Front Loader to the Hydraulics
Step 1: preparation and safety
Switch the tractor off completely and place it on a flat surface. Release the pressure from the hydraulic system by moving the lifting control. Make sure you have all the necessary parts and tools ready, including couplings, valve block, collection tray and cleaning cloths.
 Step 2: determine tapping points
Locate the high-pressure line coming from the hydraulic pump. This is often located under the seat or near the transmission. Place a T-piece or coupling here to connect the valve block. Also, locate the return line to the transmission, which will later be connected to the valve block. Be careful not to leave any dirt behind.
 Step 3: install valve block
Choose a valve block with at least two double-acting sections and a built-in pressure relief valve (maximum 110 bar). Connect this to the pressure and return line of the tractor.
Step 4: connect front loader
Connect the hydraulic hoses from the front loader to the outputs of the valve block. Check that the connections are correct so that the movements of the loader respond well. Make sure the couplings are firmly attached.
Step 5: test system
Check the oil level and top up if necessary. Start the tractor and operate the loader carefully. Check for leaks and whether the front loader moves smoothly. Tighten all bolts and grease the pivot points.
Tips and Recommendations
- Maintenance: Regularly replace the hydraulic oil and filters to maintain optimum performance.
- Manuals: Consult the user Manual of your specific Iseki model for detailed information.
- Professional advice: If in doubt, it is advisable to consult a specialist or contact us for additional advice!
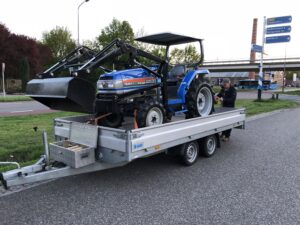
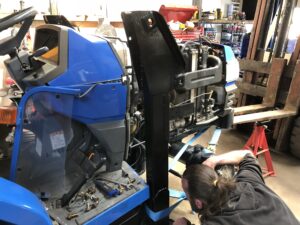
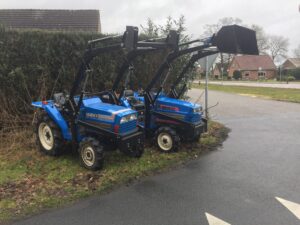
Mounting a Front Loader on an Iseki Landleader
The Iseki Landleader is a compact and robust mini tractor that is ideally suited for mounting a front loader kit. The front loader is usually attached with four bolts per side to the chassis and two reinforcement rods forward, towards the front weight bar. This construction ensures stability and prevents the frame from bending under load.
During assembly, it is important that the loader is exactly square and does not come into contact with steering rods or lines. The hydraulic lines are connected via the valve block and routed neatly along the chassis. After assembly, top up the hydraulic system and test all functions extensively.
Conclusion
A front loader kit makes a mini tractor more versatile and increases the value of the machine. Depending on the choice of a budget or premium kit, the costs for the front loader itself are between €1,600 and €3,500, with additional costs for parts and possible assembly. With the right tools and a clear step-by-step plan, a handy user can carry out the installation themselves, but if in doubt, it is advisable to call in a specialist.
Step-by-step: Attaching the Front Loader to the Chassis
1. Positioning the mounting plates
The front loader comes with sturdy U-shaped mounting arms. Position these sides so that they fit exactly over the sides of the chassis, just before or around the cab rubber or footplate. This is the ideal place, because the chassis is extra reinforced here and offers space for multiple bolts.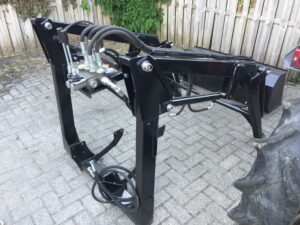
2. Attachment with four bolts per side
Each side of the front loader support is attached to the chassis with four bolts. Sometimes this can be more difficult, especially with older tractors without standard prepared mounting points.
3. Mounting the front support rods
At the front, two diagonal support rods run from the base frame to the front weight bar. These provide extra rigidity and prevent the frame from bending under heavy loads. Attach them to existing bolt holes or use reinforcement plates, preferably with an extra plate on the inside of the chassis.
4. Checking the fit
Check that the front loader can move freely and that there is no play or deformation. Use a jack or lifting arm to hold the loader in position while tightening.
5. Adjustment and fit check of the frame
Move the front loader arm up and down slightly by hand or with a hoist and check for sufficient space between the frame and hood, steering rods, lines or cables. Make sure that cylinders and arms are well aligned to prevent wear on the hydraulics.
Connecting the Hydraulics
6. Laying hydraulic lines
-
Pressure line: usually comes from under the footplate or directly from the pump. Cut the line, install a T-piece or quick coupling and connect the supply to the valve block.
-
Return line: connect the return port of the valve block to the original return line or tap a new point towards the oil pan.
-
Working lines: connect the four hydraulic hoses to the valve block (two for lifting and two for tilting). Make sure the hoses are long enough, but not too long so they can kink. Attach them with clamps along the frame.
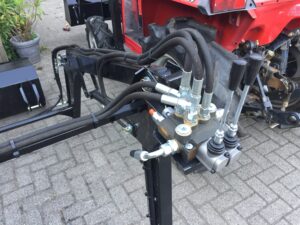
7. Mounting the control valve
The valve is mounted in an easily accessible location, often at the top of the front loader frame. Make sure the levers move freely without hitting the hood or seat. A double-acting two-section valve is standard: one section for lifting and lowering, the other for tilting the bucket.
8. Adding oil and testing the system
Fill the hydraulic tank with oil of the correct specification. Start the tractor and move the valve levers slowly. Check for leaks, pump noise or uneven movements. Refill oil after the first use, as filters and hoses absorb extra fluid.
9. Safety check and finishing
Retighten all bolts well after the first test. Grease the pivot points and, if necessary, mount a support leg so that the front loader can be easily removed. Check that the load does not block the view and that the tractor remains stable, even on slopes.
Tips from Practice
-
Measure well on the left and right to ensure symmetry.
-
Never let the front loader rest directly on the crankcase; the weight must be supported by the chassis.
-
Route the pressure and return lines neatly along the chassis to the valve block.